One of my favorite features in ELB is using it to terminate SSL. It saves me from having to manage the certificates in Chef for multiple different webservers. Getting WordPress fully over to SSL with ELB termination turned out to be a little more complicated than I thought. These are the steps that I followed to get WideAngle.com served up over HTTPS.
For this guide, I’m assuming that you already have a basic WordPress setup via normal HTTP within the Apache webserver. If you’re using a different server, most of the process stays the same but the Apache specific steps will not apply.
1. Get an SSL certificate
With the number of low cost providers of SSL certificates, getting a real cert is cost-effective. We purchased ours from Namecheap, where you can get a signed cert for less than $10.00/yr.
2. Create the ELB Listeners
You’ll still need two listeners, one each for ports 80 and 443. When adding the listener for port 443, make sure you specify that the instance protocol is HTTP and not HTTPS. Otherwise, you’ll also have to manage a certificate within Apache.
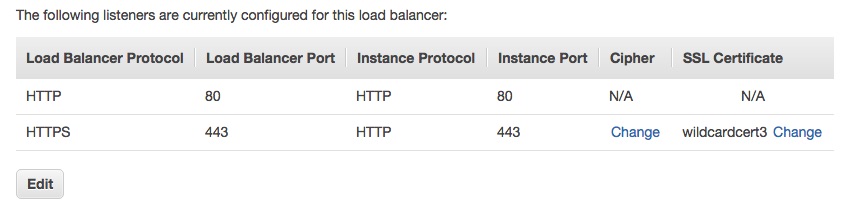
ELB listener configuration
3. Upload the cert into AWS
I’m assuming that you’re already hosted in Amazon. If not, this post is likely worthless to you.
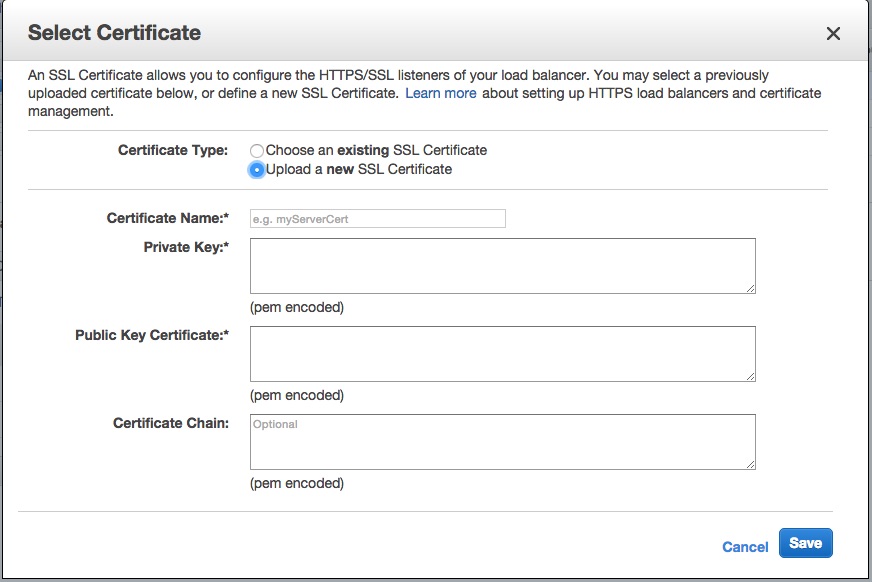
ELB's add certificate screen
Exactly what values you will need and where they can be found will vary depending on which provider you used. Also worth noting: that while the certificate chain may say optional you will want it set if you don’t want to run the risk of your visitors getting SSL errors.
4. Update Apache to Respond on 443
This is where it starts getting a little complicated. If you do not execute these steps in the correct order you will end up with an unresponsive site due to an infinite number of redirects between HTTP and HTTPS. The next step is to add a virtual host on 443 and reload apache. I’ve included a sample configuration, with the one critical line to make it all work.
<VirtualHost *:443>
  ServerName <YOUR SERVER NAME>
  ServerAlias <YOUR SERVER ALIAS>
  DocumentRoot /var/www/wordpress

  # This line is super important and will ensure that wordpress renders https links
  SetEnvIfNoCase X-FORWARDED-PROTO "^https$" HTTPS

  <Directory /var/www/wordpress>
    Options FollowSymLinks
    AllowOverride FileInfo Options
    Require all granted
  </Directory>

  <Directory />
    Options FollowSymLinks
    AllowOverride None
  </Directory>

  LogLevel info
  ErrorLog /var/log/apache2/wordpress-error.log
  CustomLog /var/log/apache2/wordpress-access.log combined

  RewriteEngine On
</VirtualHost>
The following line is super important:
SetEnvIfNoCase X-FORWARDED-PROTO "^https$" HTTPS
The ELB is not talking HTTP, not HTTPS, to Apache. If WordPress believes it is talking HTTP, it will generate HTTP links regardless of what the WordPress Address and Site Address URL are. Which brings us to…
5. Update the WordPress address and Site Address
At this stage, you need to go into WordPress and change the URLS to the HTTPS version.

Update the URLS within WordPress
6. Redirect HTTP to HTTPS
Now you have a site that responds to both HTTP and HTTPS. Now you need to change the configuration for port 80 to redirect to HTTPS. Of course, you’ll need to remember to reload your Apache config.
<VirtualHost *:80>
   ServerName <YOUR SERVER NAME>
   Redirect permanent / https://<YOUR SERVER NAME>/
</VirtualHost>
7. Test configuration
Finally, you want to make sure that the SSL setup is working. We used the SSL Analyzer from Comodo
8. Update your webmaster tools, sitemaps, etc
Okay, really finally, make sure all the tools you are using for SEO know that your site is now SSL.